
Ever wanted to send data from Ontraport to Google sheet and receive the data back, and that too without the help of 3rd party integrator like Zapier, Make or Pabbly Connect? Here is how you can do it only using Ontraport webhooks and a bit of Google scripts.
Step 1 : Create an automation in Ontraport to send a webhook when certain fields you want gets updated (Or any trigger that you like)
Step 2 : Google Sheet receives the data sent by Ontraport webhook and does whatever calculation you want it to do, and updates a column or columns in that sheet.
Step 3 : Using Google App scripts, we deploy a script that sends the updated data back to Ontraport.
Fair warning : For some, all these might sound too complicated and overwhelming and for others too easy. I'm not a programmer and only has a limited knowledge of JavaScript. If you're like me you might even find it slightly amusing!
If you are not very familiar with webhooks, let's say in simpler words that webhook is simply a url that can send and receive data. In order for it to work, you need to send them to a right place. And this right place can correctly decode the urls and record the data that's been sent across.
So there is a sender and receiver. The sender sends the data over to a unique url at the receiver's end.
For example, if you want to update a contact record in Ontraport when someone books a Calendly appointment, the sender is Calendly and the receiver is Ontraport.
If you check Ontraport API documentation, you will find that the unique receiving url is https://api.ontraport.com/1/Contacts to update a contact record.
So if we are able to send data in correct format to this link, contact record gets updated.
In our case, what we are going to do is send data from Ontraport to Google sheet first, and then send data from google sheet to Ontraport next.
So in the first step, Ontraport is the sender and Google sheet is the receiver and in the next step the roles are reversed.
In the first step, we need an end point url for google sheet to send data from ontraport and in the next step we need end point url for ontraport to send data from google sheets.
Now that you know, we need an end point url for google sheets, lets create that first. After that we will create an automation in ontraport to send data to this url. A detailed instruction on how to send data from Ontraport to Google sheet can be found on the link below.
What you want to do with the data sent over to google sheets is totally up to your requirements.
If you are sending a date field, you can add days, months or years to it or subtract it, get time in unix format very easily. If you are sending numbers, you can do all sorts of mathematical operations on it. It its a text field, you can easily do text transformations. So you get the drift.
Here in this example what we are going to do is, get a birthdate, subtract a month from it and use that date to build automations.
Alternatively you can get 30 days before a date using Ontraport date field calculations. But if you want to send a reminder on the same Day in the previous month, you might want to subtract 1 month from the date field.
For example, if someone's birthday is on March 12th and if we remove 30 days from it, you don't end up at February 12th. But if you are subtracting 1 month from the date, you will get February 12 as your trigger date.
I'd use a Google Sheet formula like the one below, if birthdates are in the first column.
=ARRAYFORMULA(if(ISBLANK(A2:A),"",EDATE(A2:A,-1)))This is just for an illustration purpose only. The formula will be different for you depending on your use case.
But before we apply this formula, we need to get the data to a new sheet so that the data sent from Ontraport stays in one file and the calculations are happening on another file. This makes things simpler for you as you will be dealing with Google scripts and permissions etc.
So we have incoming birthdates stored at this sheet along with contact IDs.
[Note : Contact ID is required in order to identify the contacts while updating the records. So you need to send 'contact_id' details to google sheets in the first step via webhooks. ]
And now we need to transfer the birthdates to a new sheet. Here is how we are going to do it.
We use 'importrange' function for that.
Step 1 : Open up a new google sheet spreadsheet
Step 2 : Apply Importrange function.
Below is how to add import range function.
=IMPORTRANGE("spreadsheet url","sheet name!Required Columns")A real case example will look like this.
=IMPORTRANGE("https://docs.google.com/spreadsheets/d/1mUdWFgmCPMRhNJ1bZBZvC3SiHA3EL--RZXt-HQwfIUk/edit#gid=0","sheet1!A2:B")This will pull the required data from Google sheets from the first step.
Now we will do any calculations on these data and generate another column to store the results.
If you are dealing with dates, one thing you should understand is, Ontraport accepts dates in Unix format.
Here is a formula to convert any dates into Unix format using Google Sheets if the date is in Column C.
=ARRAYFORMULA(if(ISBLANK(A2:A),"",(C2:C-DATE(1970,1,1))*86400))So now we have the data, we have done the calculations and we have the transformed data that we want to send to Ontraport. It is now time to send this data to Ontraport. Let's see how it is done.
It took me many hours to come up with the script, test everything out and to finally to make it work. But for you, all you have to do is Copy and Paste the script and change a few parameters to suit your requirements.
To start the process, you can go to Google sheets >> Extensions >> App Script
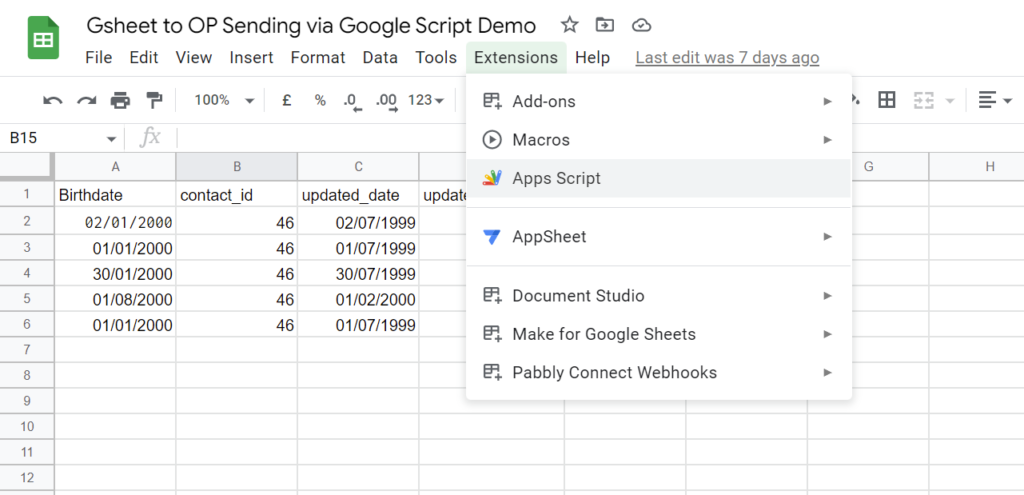
It will open up a page where you can add the code. In that space, you need copy and paste the below code.
<< You can download the code here by filling out the short form. >>
In this code, you need to update a few values with your own values. Those are marked in bold italics with an underline.
You have to update the Google sheet id and sheet name at the beginning of the code.
Then you have to define the variables you want to send. Let's look at an example
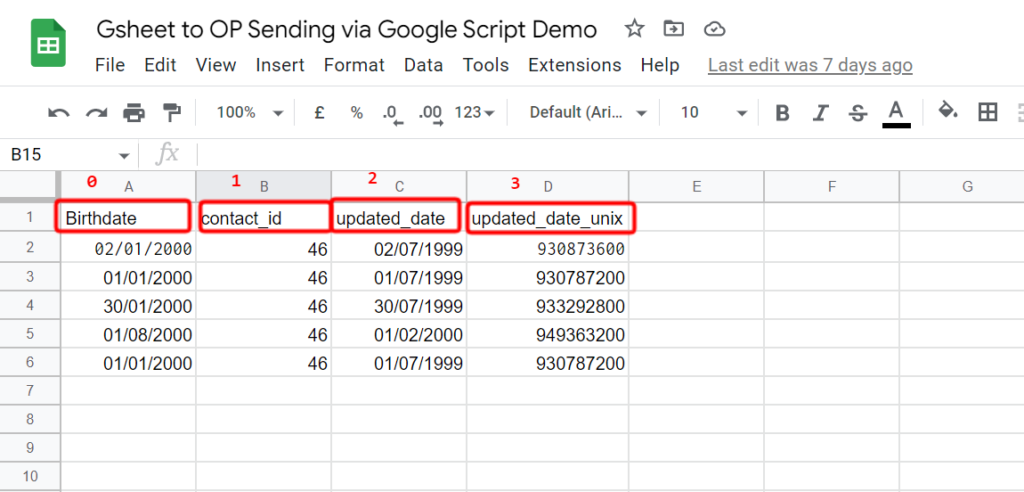
One part of the code above looks for the last row in the sheet and pass the value of required variables. The last row is saved as an array like this [ Birthdate, contact_id, updated_date, updated_date_unix] and the array location starts from 0. So the first item is said to be located at '0'th position. So birthdate will be at the 0th location of the array, contact_id at the 1st location of the array and so on.
So to access it what we have to do is call that location like array[0] or array[1] and so on.
Simpler terms, if you want the value of update_date_unix, you have count its column number in google sheets and minus 1, ie. 4-1 = 3
That is why var new_date = lastNonEmptyRowValues[3]; where we are sending the update_date_unix value to the new_date variable.
So look at your google sheet columns, check what variables you might need and change accordingly.
Now comes the part where it says "f2130": new_date
'new_date' is the variable we created and which stores the value of date in unix. Now we need to map it to the correct custom field in Ontraport. So we need to find that custom field in Ontraport and figure out what is the name of that variable in the backend of Ontraport API.
For that we have to go to Ontraport API Live website. Add your Ontraport API credentials and it will generate all your custom objects and possible webhook methods available for them.
In this case, you have to find Contacts >> PUT method >> And the custom field you are looking for.
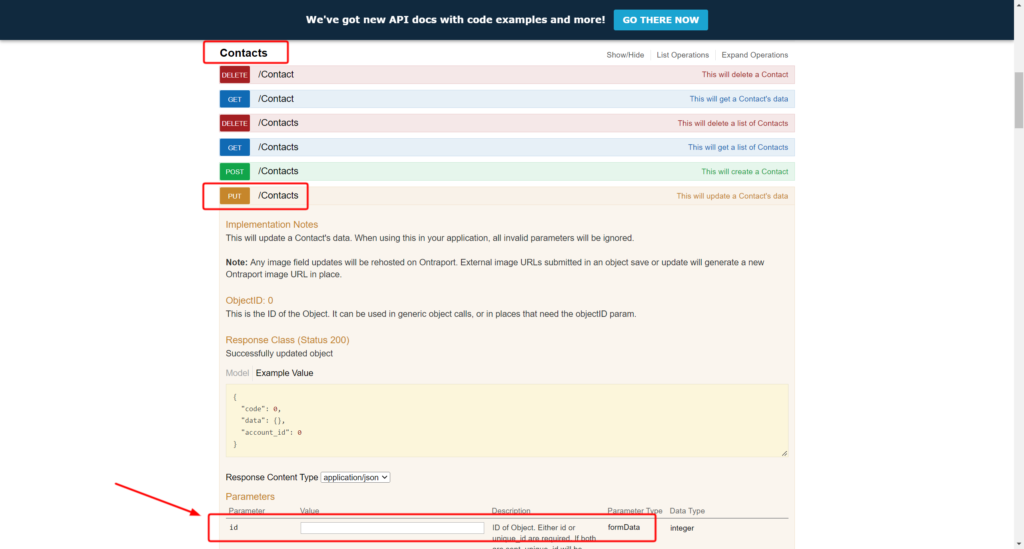
In the above image you can see 'id'. Similarly for each custom fields, it will have its parameter name given on the left side. You have to find it and use it appropriately.
Once you set everything up, click on Test to see if everything is working as expected. You will get the status of the execution. If there are any errors, you have to debug them looking at the error message.
Hopefully there won't be any error, if you've followed everything as instructed.
As mentioned earlier, the code gets the last row from the google sheet provided and assigns values from there and then sends these values to Ontraport as a webhook.
When we run this code, in the log area, you can see the values of the variables, especially the contact_id value.
So if we go to Ontraport and check the contact with this particular contact_id, this particular contact should have an updated value for the custom variable we have chosen to update. And this updated value should correspond to the value from the last row in google sheets.
For example, here is the execution log of Google App script
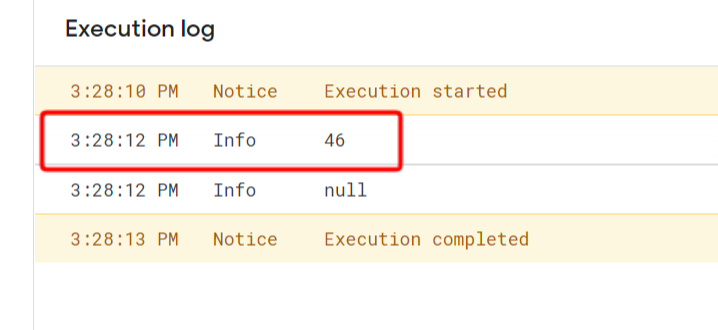
You can see that the contact id is 46.
Now we can check what is the last row of google sheet looks like
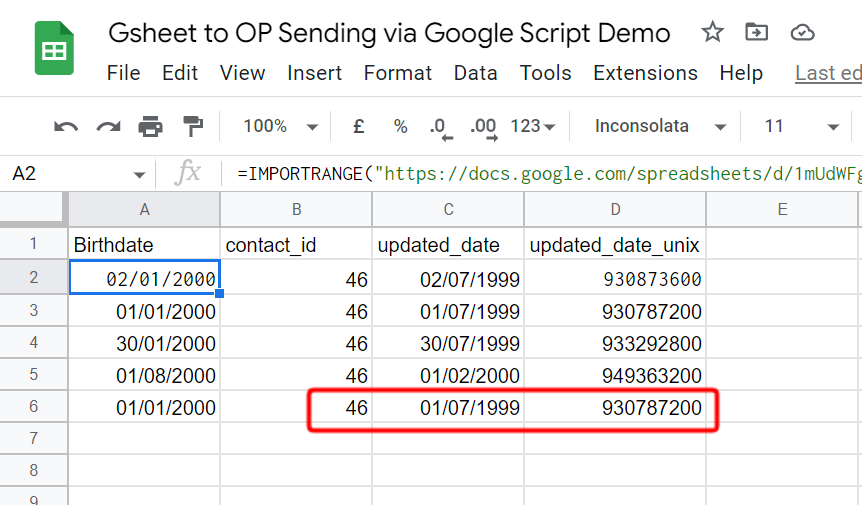
Its the moment of truth. If everything worked, this value should be reflected in Ontraport.
You can go to this link https://app.ontraport.com/#!/contact/edit&id=46 to access the contact straight away. You just need to change the id value in the above link.

You can see the contact record, does reflect that value! Success!
So far what we have done is writing a code to get data from the last row and send it to Ontraport. But this process isn't automatic yet. We haven't set any triggers yet. So next step is to set up a trigger.
On the left hand side panel, under editor, you can see Triggers. Once you click that, you will be able to set up your trigger.
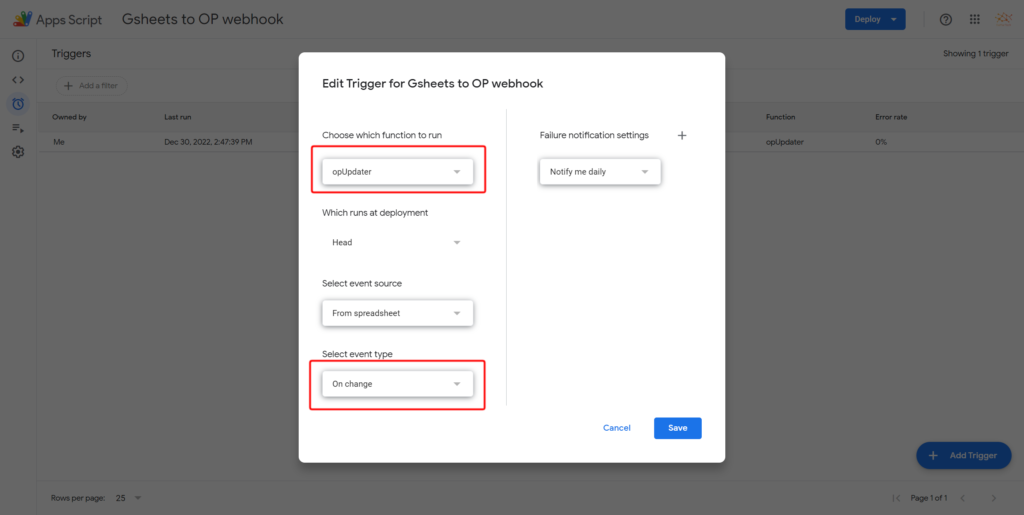
You just need to select the correct function, and select event type as "On Change". So this will make the function to run whenever there is a change in the Google sheets.
So whenever someone updates a row, this function will fire and the updated value will be sent to Ontraport.
Now it is time to test the trigger and this is going to be the full testing of all the elements involved.
So first thing would be to send the data from Ontraport to Google Sheet. You update the custom field which will trigger the automation to trigger the webhook. This action should add a new row to our first google sheet.
This new row will be pulled into our second google sheet due to the import range function. And the addition of a new row should activate the Google script trigger which in turn runs the script. This script will then send the webhooks to Ontraport and update the custom field.
So you should need new rows in google sheets and updated field in Ontraport. If you are seeing these changes, it means that all of the elements are working as expected.
Do you want to see how this all works with a real example. Here is your chance.
Here is the link for you to try it out and see what it can do for you.
If you have any questions, do let me know in the comments.